Tabs - Tutorials

Tuesday, June 26, 2012

Photo bookmark with Purpose


Independence Day Gift
by Tammy Louise
I'm sharing a special book mark with you today!  I bought a pack of these folded book marks with a photo months and months ago and haven't had the opportunity to make one until today.  Here, let me show you what I've done!


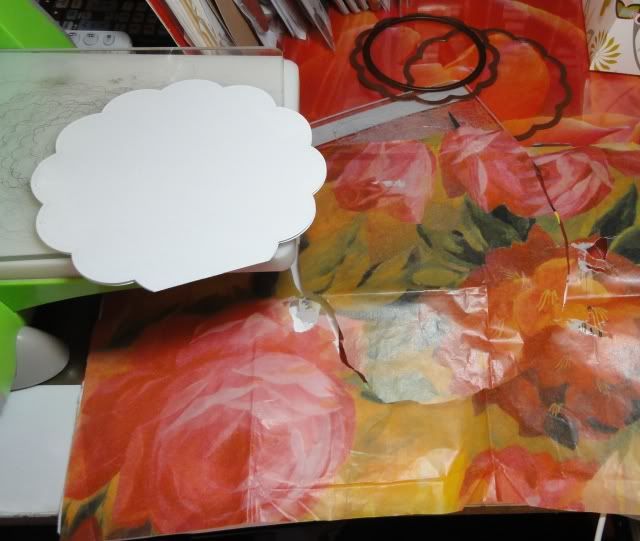
This is the original bookmark purchased in a pack of 10


The window pocket was removed prior to embossing with a folder on the top layer only


I taped the window and rubbed it across the top of the distress pad to achieve a line appearance


I used silhouette stars and embossed them onto stock then used an embossing folder, rubbed them on top of a distress pad and sponged the edges


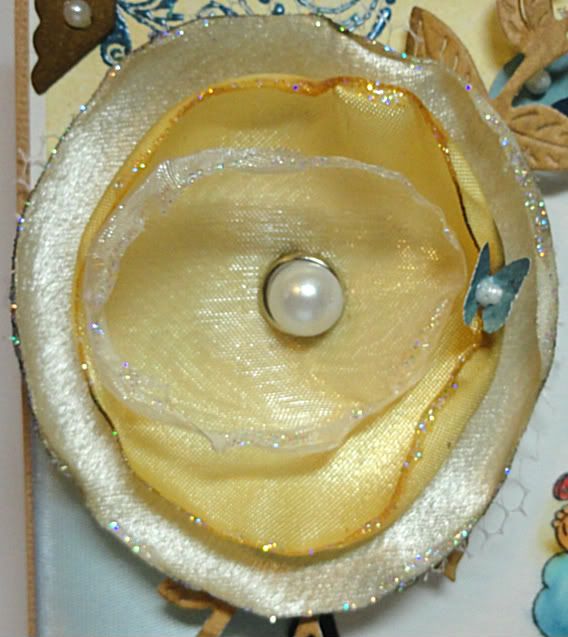
I used Distress Ink, colored, dried and scrunched gauze


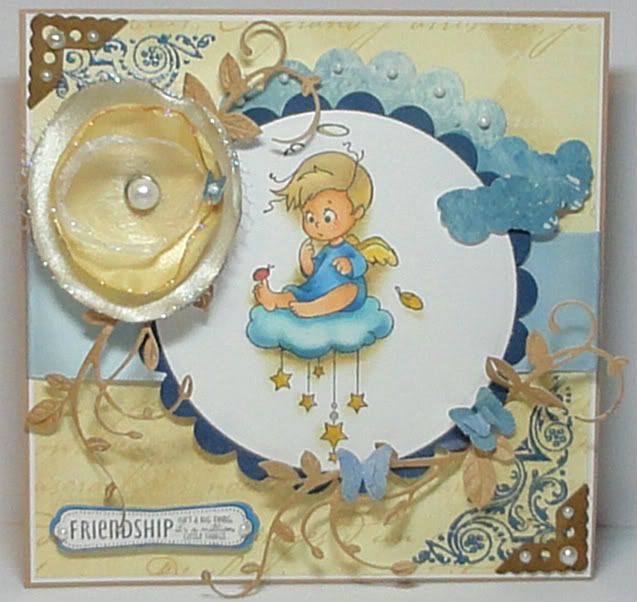
This bookmark has the ability to remind you of a family member while their away and bring them closer to your heart while you curl up and read that book!  The front is embossed and distressed, the stars are from silhouette stars from the web and embossed into the stock I cut them from and distressed.  I've color coordinated the hemp and gauze then used 8 or 9 sentiment images from a great Whimsy collection to finish off the inside!  I hope you enjoy it!  Don't forget the star brad, photo insert and coloring of the Bugaboo image!


 INGREDIENTS: 
Bugaboo Image Kidlet Army
Recollections Photo Frame
Definitions Notables 4 Sentiment and Vintage Travel Postage Stamps by Raindrop Echo Design w/Whimsy
Bazzill and Kraft stock


MEDIUMS: 
Ranger Distress Ink
Brushed Cordoroy and Peeled Paint
The Paper Studios Embossing folder A2 Script


 EMBELLISHMENTS: 
Hemp Cord by Create Cousin
Spare Parts - The Ppaper Studios Star Brads
altered gauze with distress
handmade stars


 INSPIRATIONAL THOUGHT FOR THE DAY:
Failures are finger posts on the road to achievement.
- C. S. Lewis

Coordinated distress Inks and versafine around the edges with the postage seal stamps and the Sentiment of Moments at the bottom?

   If you enjoy a good 3D project or just need a special box or bag, stop by the Whimsy Stamps Store available today for my Shape "EZ" product line of Cut templates like bags, boxes, flowers, and cards with tons of add on's! These templates can help you make any project just the way you like it. Over and Over again! The NEW Shape "EZ" cut files are available today! 

 Thank you for visiting,
Photobucket

Saturday, April 21, 2012

Tissue Mod Tutorial


This and many more tutorials and projects in full can be found in issue 8 of the Whimsy Stamps Magazine


Tissue Mod Tutorial
by Tammy Louise
as found in Whimsy Stamps Magazine issue #8


This was the finished project in the April Whimsy Stamps Magazine

Photobucket


If you enjoy a good 3D project or just need a special box or bag, stop by the Whimsy Stamps Store available today for my Shape "EZ" product line of Cut templates like bags, boxes, flowers, and cards with tons of add on's! These templates can help you make any project just the way you like it. Over and Over again! The NEW Shape "EZ" cut files are available today!
 Thank you for visiting,
  Photobucket

Thursday, March 22, 2012

Scallop Circle Flowers with Nestability dies


This and many more wonderful projects including other tutorials can be found in the issue 8 Whimsy Stamps Magazine here
SCALLOP CIRCLE TUTORIAL
by TAMMY LOUISE
as found in the Whimsy Stamps Magazine issue #8
This tutorial is going to show you how I made the beautiful handmade flowers with material and the scallop circle Nestability Die.  The process is fast and easy to do and will add a personal touch to any of you creations.  


The flowers are complete, turn them over, fluff them and add desired embellishments


This side view shows the two different size circles used and the height of the flower, I've made these multi colored to match a Sylvia Zet project in this issue

If you enjoy a good 3D project or just need a special box or bag, stop by the Whimsy Stamps Store available today for my Shape "EZ" product line of Cut templates like bags, boxes, flowers, and cards with tons of add on's! These templates can help you make any project just the way you like it. Over and Over again! The NEW Shape "EZ" cut files are available today! 

Thank you for visiting,
Photobucket

Tuesday, February 28, 2012

Die Cut Lolli Pops


LOLLI POP FLOWER WITH DIE CUT
by Tammy Louise
at Whimsy Stamps Magazine

Who doesn't love those soft,silky beautifully symmetrical flowers on their projects? If you have 5 minutes extra and want to save some pretty pennies, try this great tip for yourself.  I am not the first to have made a tutorial on this project and I'm sure It is posted on You Tube in several areas,  however, my followers may have never seen it and I don't mind putting the effort in to share.  


With Spellbinder Nestabilities standard circle dies in any size you prefer, place them face up on your cutter and place your material over them and run them through, I use two or three sizes at a time so I cut at least 3 flowers worth of material.

Once the circles are cut, I use open flame, but the heat tool works as well, do not leave the material directly under flame too long as the material will over brown.  Practice and avoid burning

This petal is sealed and automatically curled up from the flame 

I've cut from two shades of satin, one cotton and one from tulle for  texture, the tulle and the lightest satin are from the same size die

layer your flowers as desired from large to small, some of the flowers can be 4 and 5 layers, others are with 3, this is your preference and each project can look entirely different with the various styles!

I place the pearl brad from WOC in the center and wiggle it through the material and clasp in the back

Here are some of the samples done within 5 minutes time, and the toastier one on the right is my favorite!  It lookes like a perfectly aged blossom but the softer looking bloom is the one for this project!

After clasping, I use stickles to "Bling" the edge of each layer, I've added a butterfly for color combination on the project and the end result is a handmade perfectly matched very inexpensive alternative to the mass produced  flowers

This project is made with Angel Cody by Sylvia Zet/Wee and is a part of the March Whimsy Stamps Release
Photobucket

If you enjoy a good 3D project or just need a special box or bag, stop by the Whimsy Stamps Store available today for my Shape "EZ" product line of Cut templates like bags, boxes, flowers, and cards with tons of add on's! These templates can help you make any project just the way you like it. Over and Over again! The NEW Shape "EZ" cut files are available today!

 Thank you for visiting,
Photobucket 

Thursday, December 22, 2011

Stamped Charm Tutorial


Find this tutorial in full and many more wonderful projects in Issue 5 of the Whimsy Magazine here

                     Stamped charm tutorial

                 by Tammy Louise

for Whimsy stamps Magazine

Stamp your favorite small rubber images on DP of your choice

Apply the label to the box and insert your warming gift

INGREDIENTS:
Handmade by TLC box
Misc DP 
Notables Sentiment by Raindrop Echo w/Whimsy
Notables Elegant Die by Raindrop Echo w/Whimsy
Winter Notable Stamp
Stamping Up Wire

MEDIUMS:
Momento Ink Black
Ranger Distress Ink
Royal Coat Dimensional Magic liquid by Plaid

EMBELLISHMENTS:
Findings clasps
Jump rings
Beads and Silk Ribbon from stash

 INSPIRATIONAL THOUGHT FOR THE DAY: 

Stop by the Whimsy Stamps Store available today for my Shape EZ line of digital forms and shaped product lines like bags, boxes, flowers, and cards with tons of add on's that help you make the project just the way you like it. Over and Over again! The NEW Shape EZ Cut files available today!

 Thank you for visiting
Photobucket

Tuesday, November 15, 2011

Vellum Christmas Card Tutorial


See through Christmas Bear! + Tutorial

Today's project

Acetate Card Tutorial
by Tammy Louise

Supplies needed:
Paper Trimmer
Scor pal
Pop up dots
Staz on Ink any colors
2 eyelets American crafts Silver
3M Write On projector sheet cut to 5 1/2 x 11
Two small Stock squares  2 3/4 "
Two Larger Stock squares 3 1/2"
Stamped image

Stamp a small spotty image to front of Acetate

Open the card and Stamp on the inside sheet toward the edges
Place the card back together and I used silver snow flakes to fill in the enpty spaces
Place brads through the front of the card and run ribbon through and tie in the front of the card

color the image and I distressed the snow flake

I used Nestabilities Label 1 (two white and two larger in blue)


Place the smaller white label downward in the center of the larger blue label for the writing area 


Apply the next larger blue label in the same fashion on the back of the front cover with pop dots facing up
Difficult to take photo

Little better view

I've glued the snow flake and button over the knot of the tied ribbon.  Sentiment added and the project is complete!  I hope you enjoyed the tutorial and try an acetate card, their a little difficult to photo but a dream to make!  Thanks for joining me!
Hugs
Tammy Louise


Ingredients I Used
Image is Teddy Bo #101
Stampin Up stamps
Recollections Sentiment
Raindrop Echo Designs "Holiday mini stamps" at Whimsy Stamps Store
Mini Postage stamp die by Raindrop Echo Designs w/ Whimsy
Ribbon from stash
Snow Flake 7 die Cheery Lynn
Copic sketch
Gelly roll "Clear Star"
Pentel Sunburst Med gel white pen
Stormy Sky Ranger Distress Ink

 INSPIRATIONAL THOUGHT FOR THE DAY: 

* Mental attitude is more important than mental capacity. 
Walter Dill Scott 


Stop by the Whimsy Stamps Store available today for my Shape EZ line of digital forms and shaped product lines like bags, boxes, flowers, and cards with tons of add on's that help you make the project just the way you like it. Over and Over again! The NEW Shape EZ Cut files available today!

 Thank you for visiting,
Photobucket
Thank you for visiting,

Tuesday, November 8, 2011

Waterfall Card Tutorial for Top Tip Tuesday!


Waterfall card Tutorial

Supplies:
double sided tape runner
Scor tape
2 brads
circle punch
Scor pal
paper trimmer
Guilded Christmas Dove 

Stock paper cut to 4 ¼ x 11 (card base)
Score the card in half to total 4 ¼ x 5 ½
Design paper is cut to 4 x 5 1/4

4 squares from light Stock Paper cut to 1 7/8 x 1 7/8 (for image)
Dark stock paper for framing lighter paper cut to 2 x 2

A strip of coordinating stock paper cut to ¾ x 4 (pull tab hold bar)

Dark stock paper cut to 2 x 9 (for pull tab)

Steps:
Stamp or print and cut out your images on the Light 4 squares, color them in
I used copics Signo White pen and Jelly Roll "Clear Star" pen
Tape the images to their darker stock frames

Score the long strip at 2”,  2 ¾”, 3 ½”, 4 ¼”

Apply the Design paper to the Card base
Connect the small ¾ “ strip to the lower section of the face of the card with eyelets
Insert the un=scored end of the 9” strip under the ¾ inch stock paper

Place a 2” long piece of score tape in the middle of the top of the ¾ “ strip of stock
With the unscored end 9” strip under the ¾ dark holding strip, fold it forward and attach it down onto the sticky tape

From the bottom going up, adhere each of the squares to the 9” strip just under the score line

Use a 2” circle punch and snip out a small portion of a circle in the center of the bottom of the front of the card

Staple the ribbon to the bottom of the 9" pull tab centered
I added a button over it, distressed the edges, and added a silver metallic stazon sentiment

I hope you've enjoyed the tutorial and give it a try, it's quick, inter active and fun to make!
Tammy Louise


INGREDIENTS:
MEDIUMS:
EMBELLISHMENTS:
INSPIRATIONAL THOUGHT FOR THE DAY:
Thank you for visiting,