Tabs - Tutorials

Wednesday, September 12, 2012

Cutting PDF Shape EZ templates without a machine July 2012


CUTTING PDF SHAPE EZ TEMPLATES WITHOUT A MACHINE 
BY TAMMY LOUISE

Often you fall in love with a template and/or creation but because it is in an SVG/PDF format, you don't think it can be done without owning a cutting machine.  I have been asked whether the Shape EZ templates have to use a machine???  The answer is . . . NO!  You can create with any of the Shape EZ w/Whimsy templates or any PDF file for that matter without investing in a cutting machine.  The projects can be created with 8 1/2 x 11 full sheets or it can be done by making templates so you can use all those scraps too!  Just follow these easy steps.

To hand cut projects with full sheets of paper
When you receive your download from Whimsy Stamps, not unlike any digi file, you store these files on your system.


Open your file folder 
hover over all of your files until you find the base of your project in the PDF format
In this step, you're looking for the base and not any of the inserts or extras


Double Click on your file


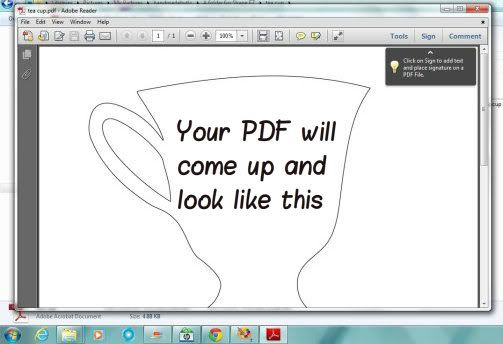
Your PDF will open up 
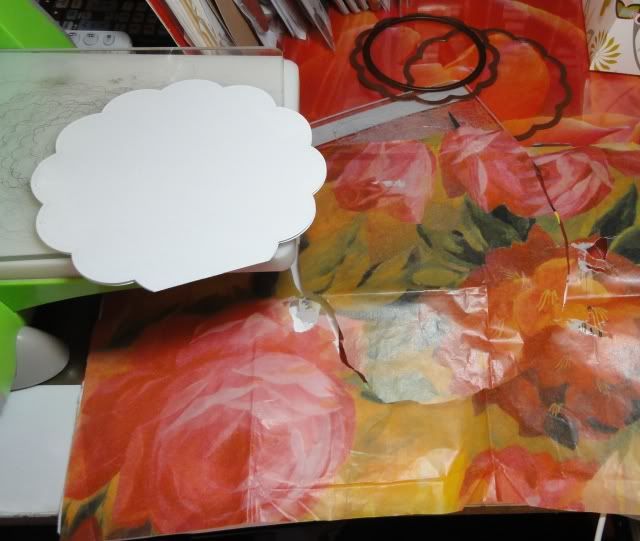
Choose a stock paper for the project and insert into printer (that is for the base of your card)


After printing it looks like this!  


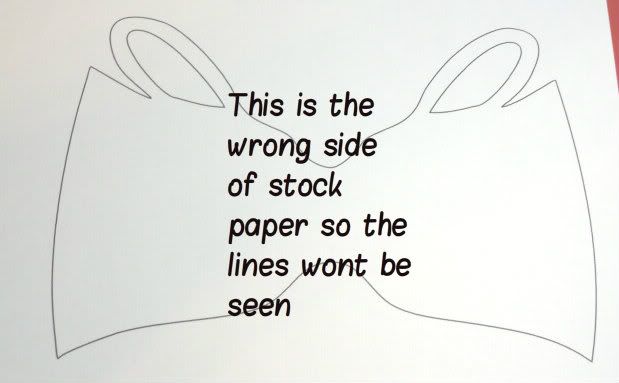
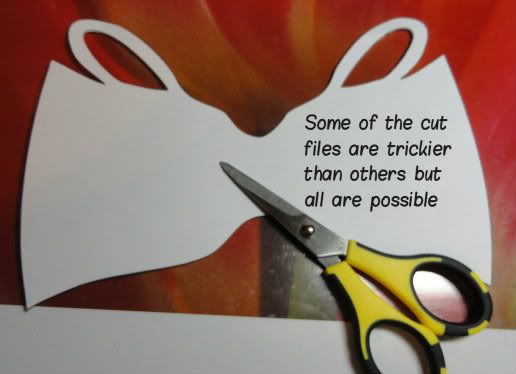
This template is more simple than some but when using  sharp scissors, all of them can be done


Then print one of the PDF files for the "insert" of the template ( this is the file that is 1/8 " smaller all the way around the shape) on the back side of design paper the same way you did the stock


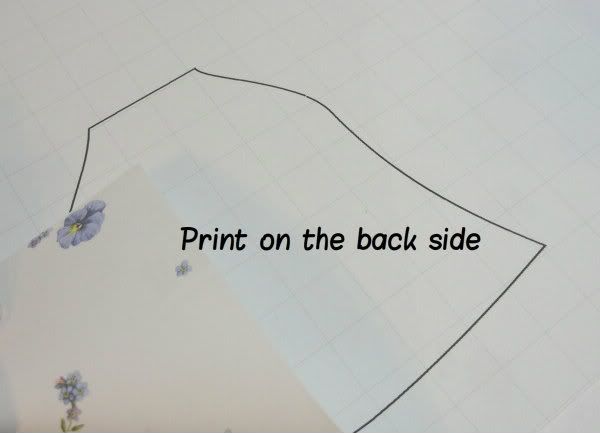
If you want two inserts from the same DP, place DP back into printer so the image prints on the backside but at the bottom of the paper instead of the top (basically just enter the paper from the other edge into the printer)


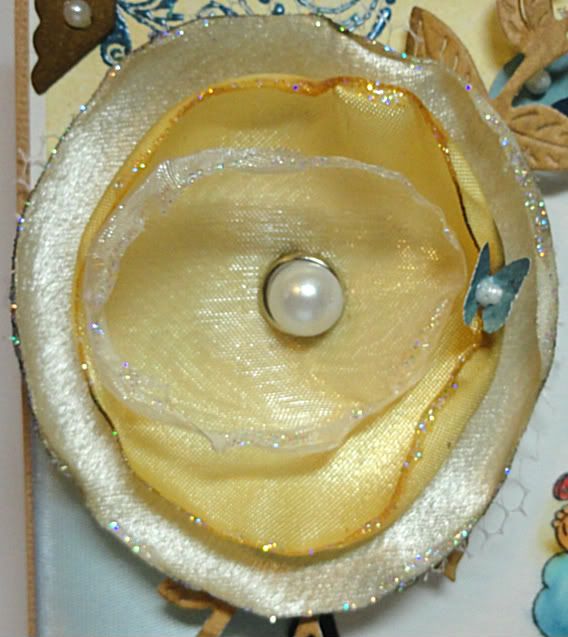
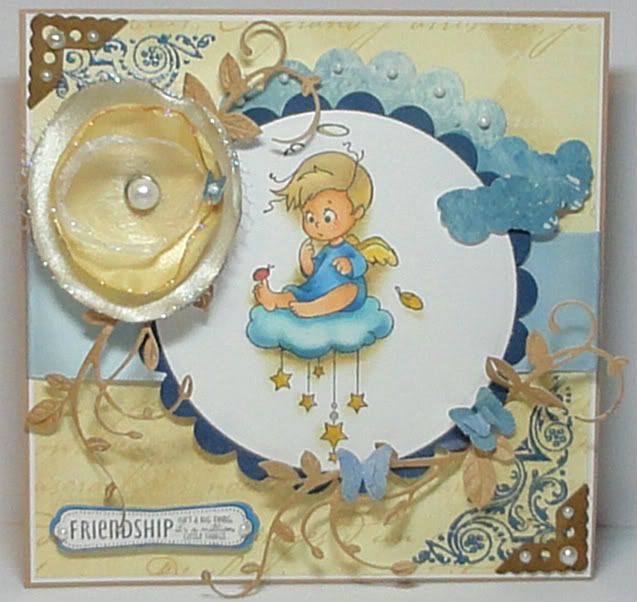
Some of the finished projects here in this Whimsy Stamps magazine and others in the Whimsy Inspirations gallery.

To create with your scraps of paper

Print one of the inserts on regular copy paper


Use this template for all future cuttings by keeping it in an album or a pouch 


Thank you for visiting,

Sunday, July 15, 2012

Scalloped Buttons and Bows


I cut two of the scalloped die out from scrap stock to use as a topper

Because my die has inside decorations I wanted to keep, I cut away the scallops

Score the 8 12/11 card stock in half at 5 1/2 " and fold

Place the die above the fold and cut through your cutter

The light blue is now your card and the purple is the base of my topper
I also cut one circle from my DP, inked some flourishes on one edge and glued to fit inside my dark purple topper.   Punched 5 or 6 circles in multiple sized and stamped some circle sentiments from Raindrop Echo Designs onto them

Using the Dimensional liquid, I filled in the stamped image only section of the circles 

If you find bubbles inside, pin prick them to release the air

All of the circles were embossed with a circle folder through the Cuttlebug, I found a sentiment with circles too and used momento ink, glued around the edge and applied twinklets for the sparkle!

Then Die cut 3 Lacey circles, I used Spellbinders Nestabilities but any 2 1/2" to 3" die will work

Glue the first two together, hold till dry

Bend the first two outward and place glue on each edge for the third piece 

Create a sentiment of choice and distress the edges while the cupcake flag dries

I use hot glue for the pop stick in the middle

Finished project with two pearl beads and a bow or two full of circles!


Thank you for visiting,

Tuesday, June 26, 2012

Photo bookmark with Purpose


Independence Day Gift
by Tammy Louise
I'm sharing a special book mark with you today!  I bought a pack of these folded book marks with a photo months and months ago and haven't had the opportunity to make one until today.  Here, let me show you what I've done!


This is the original bookmark purchased in a pack of 10


The window pocket was removed prior to embossing with a folder on the top layer only


I taped the window and rubbed it across the top of the distress pad to achieve a line appearance


I used silhouette stars and embossed them onto stock then used an embossing folder, rubbed them on top of a distress pad and sponged the edges


I used Distress Ink, colored, dried and scrunched gauze


This bookmark has the ability to remind you of a family member while their away and bring them closer to your heart while you curl up and read that book!  The front is embossed and distressed, the stars are from silhouette stars from the web and embossed into the stock I cut them from and distressed.  I've color coordinated the hemp and gauze then used 8 or 9 sentiment images from a great Whimsy collection to finish off the inside!  I hope you enjoy it!  Don't forget the star brad, photo insert and coloring of the Bugaboo image!


 INGREDIENTS: 
Bugaboo Image Kidlet Army
Recollections Photo Frame
Definitions Notables 4 Sentiment and Vintage Travel Postage Stamps by Raindrop Echo Design w/Whimsy
Bazzill and Kraft stock


MEDIUMS: 
Ranger Distress Ink
Brushed Cordoroy and Peeled Paint
The Paper Studios Embossing folder A2 Script


 EMBELLISHMENTS: 
Hemp Cord by Create Cousin
Spare Parts - The Ppaper Studios Star Brads
altered gauze with distress
handmade stars


 INSPIRATIONAL THOUGHT FOR THE DAY:
Failures are finger posts on the road to achievement.
- C. S. Lewis

Coordinated distress Inks and versafine around the edges with the postage seal stamps and the Sentiment of Moments at the bottom?

   If you enjoy a good 3D project or just need a special box or bag, stop by the Whimsy Stamps Store available today for my Shape "EZ" product line of Cut templates like bags, boxes, flowers, and cards with tons of add on's! These templates can help you make any project just the way you like it. Over and Over again! The NEW Shape "EZ" cut files are available today! 

 Thank you for visiting,
Photobucket

Saturday, April 21, 2012

Tissue Mod Tutorial


This and many more tutorials and projects in full can be found in issue 8 of the Whimsy Stamps Magazine


Tissue Mod Tutorial
by Tammy Louise
as found in Whimsy Stamps Magazine issue #8


This was the finished project in the April Whimsy Stamps Magazine

Photobucket


If you enjoy a good 3D project or just need a special box or bag, stop by the Whimsy Stamps Store available today for my Shape "EZ" product line of Cut templates like bags, boxes, flowers, and cards with tons of add on's! These templates can help you make any project just the way you like it. Over and Over again! The NEW Shape "EZ" cut files are available today!
 Thank you for visiting,
  Photobucket

Thursday, March 22, 2012

Scallop Circle Flowers with Nestability dies


This and many more wonderful projects including other tutorials can be found in the issue 8 Whimsy Stamps Magazine here
SCALLOP CIRCLE TUTORIAL
by TAMMY LOUISE
as found in the Whimsy Stamps Magazine issue #8
This tutorial is going to show you how I made the beautiful handmade flowers with material and the scallop circle Nestability Die.  The process is fast and easy to do and will add a personal touch to any of you creations.  


The flowers are complete, turn them over, fluff them and add desired embellishments


This side view shows the two different size circles used and the height of the flower, I've made these multi colored to match a Sylvia Zet project in this issue

If you enjoy a good 3D project or just need a special box or bag, stop by the Whimsy Stamps Store available today for my Shape "EZ" product line of Cut templates like bags, boxes, flowers, and cards with tons of add on's! These templates can help you make any project just the way you like it. Over and Over again! The NEW Shape "EZ" cut files are available today! 

Thank you for visiting,
Photobucket

Tuesday, February 28, 2012

Die Cut Lolli Pops


LOLLI POP FLOWER WITH DIE CUT
by Tammy Louise
at Whimsy Stamps Magazine

Who doesn't love those soft,silky beautifully symmetrical flowers on their projects? If you have 5 minutes extra and want to save some pretty pennies, try this great tip for yourself.  I am not the first to have made a tutorial on this project and I'm sure It is posted on You Tube in several areas,  however, my followers may have never seen it and I don't mind putting the effort in to share.  


With Spellbinder Nestabilities standard circle dies in any size you prefer, place them face up on your cutter and place your material over them and run them through, I use two or three sizes at a time so I cut at least 3 flowers worth of material.

Once the circles are cut, I use open flame, but the heat tool works as well, do not leave the material directly under flame too long as the material will over brown.  Practice and avoid burning

This petal is sealed and automatically curled up from the flame 

I've cut from two shades of satin, one cotton and one from tulle for  texture, the tulle and the lightest satin are from the same size die

layer your flowers as desired from large to small, some of the flowers can be 4 and 5 layers, others are with 3, this is your preference and each project can look entirely different with the various styles!

I place the pearl brad from WOC in the center and wiggle it through the material and clasp in the back

Here are some of the samples done within 5 minutes time, and the toastier one on the right is my favorite!  It lookes like a perfectly aged blossom but the softer looking bloom is the one for this project!

After clasping, I use stickles to "Bling" the edge of each layer, I've added a butterfly for color combination on the project and the end result is a handmade perfectly matched very inexpensive alternative to the mass produced  flowers

This project is made with Angel Cody by Sylvia Zet/Wee and is a part of the March Whimsy Stamps Release
Photobucket

If you enjoy a good 3D project or just need a special box or bag, stop by the Whimsy Stamps Store available today for my Shape "EZ" product line of Cut templates like bags, boxes, flowers, and cards with tons of add on's! These templates can help you make any project just the way you like it. Over and Over again! The NEW Shape "EZ" cut files are available today!

 Thank you for visiting,
Photobucket